

How To Set Up Arlo Camera System
How to Gear up Arlo Security Cameras

Arlo'south security cameras are some of the all-time in the business organization, and setting them up is a cakewalk. Here are seven easy steps to aid you ready your new Arlo camera like a pro.
-
Photographic camera Safety: Help Prevent Your Cameras from Being Hacked
1. Download the Arlo app
The Arlo app walks you through the setup process and allows you to adjust camera settings. You tin't install a photographic camera without the app. Once yous download the app, create an account and showtime adding your first photographic camera by choosing your model from the listing.

Stay Safety! Sign up for SafeWise's weekly newsletter.
Go updates on the latest safety news, production releases, and deals.
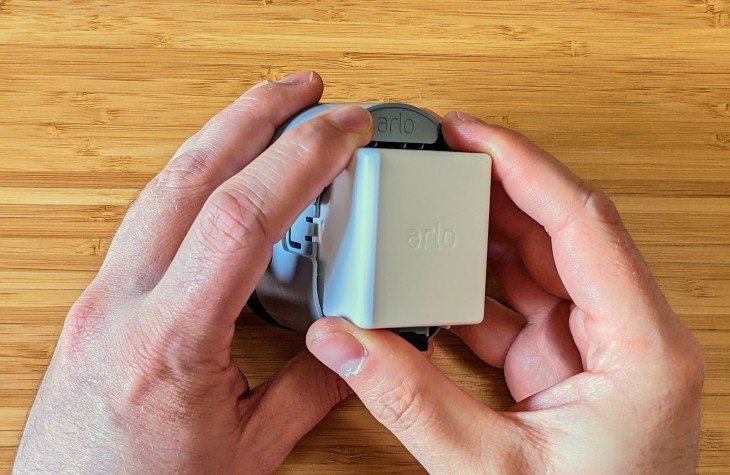
ii. Plough on your Arlo camera
Wire-costless models: Insert and charge battery
Paradigm: John Carlsen, SafeWise
When you first the setup process on a wire-gratuitous Arlo camera, follow the instructions for installing the bombardment in the camera housing. The battery has grooves on the bottom to forestall you from installing information technology upside down.
Afterwards inserting the bombardment, shut upwards the camera'south case and check the LED on the forepart. If the light is an amber colour, connect information technology to the included charging cablevision. If it's flashing blue, you tin can skip charging and move on to the adjacent footstep.
Wired models: Detect an outlet
Wired Arlo cameras need to be within 6 feet of an outlet. You tin can buy optional power cables for wireless models in lengths of 8 and 25 feet. Arlo also sells solar console chargers that work with its outdoor cameras.
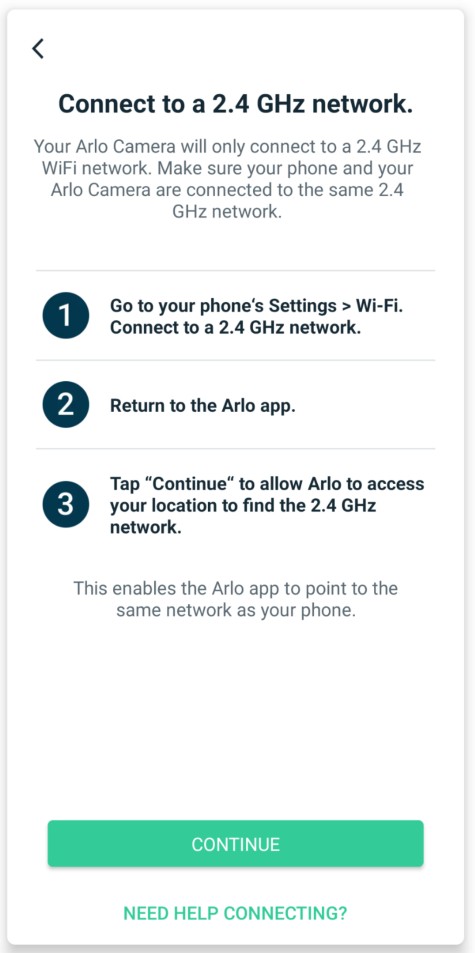
iii. Connect your Arlo camera to Wi-Fi
Paradigm: John Carlsen, SafeWise
Once your photographic camera has power, follow the Arlo app's instructions for connecting it to your Wi-Fi network. Enter the name and password for your wireless network, and the app will create a QR code for the photographic camera to scan. Wait for the camera to chinkle afterward scanning the code. Be aware that Arlo cameras do not work with 5 GHz Wi-Fi networks. Instead, you'll need a 2.four GHz network.
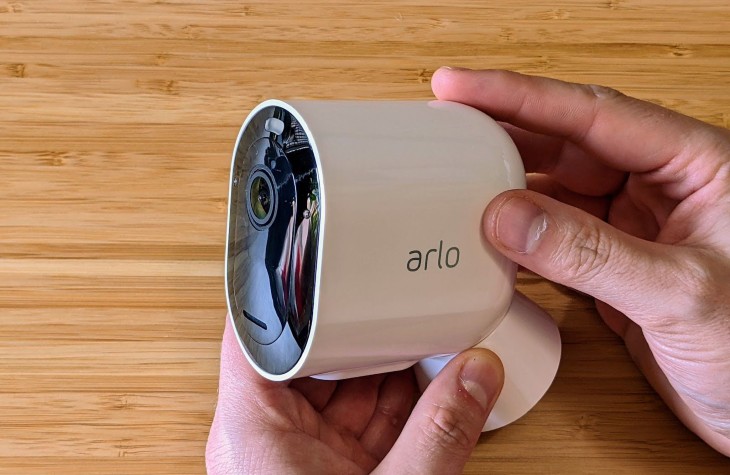
4. Place your Arlo camera
Choose your mount
Install your Arlo camera around half dozen to 7 feet above the ground. This is the best vantage point for capturing video footage and motion detection without being too difficult to accomplish.
Shelf
The Arlo Essential Indoor and the Arlo Q (its predecessor) are the only Arlo cameras with built-in stands that work well when placing the cameras on a shelf. While most other Arlo cameras can remainder on a shelf, you won't have many choices for pointing them towards the activeness without a mount.
Magnetic mount
Paradigm: John Carlsen, SafeWise
You can use a magnetic mount with any Arlo Ultra or Arlo Pro camera. This mount attaches to the wall with a single spiral, a drywall anchor, and a plastic stopper that clips into the back.
Outdoor mountain
Utilize one of Arlo's outdoor mounts for improve security if you're placing a camera outdoors. These mounts use a screw to secure the camera in place. They're not easy to take off the wall compared to magnetic mounts. Arlo also recommends using these mounts if you need to identify a camera higher than 6.v feet.
v. Adjust your Arlo camera'due south view
Although most Arlo cameras accept a wide field of view to capture tons of activity, yous can conform the camera for a ameliorate view, allowing for more accurate motion detection, notifications, and recording.
Camera positioning
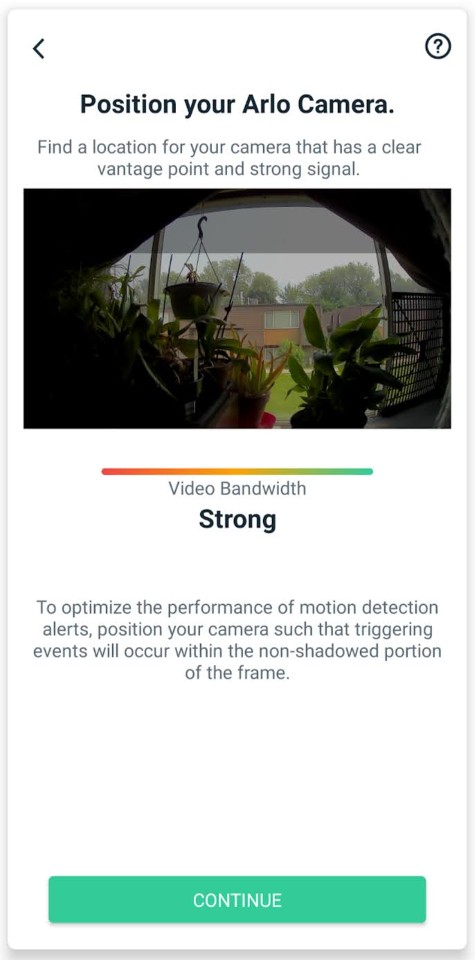
Image: John Carlsen, SafeWise
Using Arlo's Camera Positioning setting, you tin arrange the camera's view in near real-time with very little lag. This setting tells the camera to ship video apace (usually at a lower quality) so you don't need to await equally long for the live view to catch upwards with your adjustments.
- Navigate to the Settings menu in the Arlo app.
- Select My Devices and cull the camera you want to adjust.
- Select Device Utilities and then Camera Positioning.
- Adjust the camera while looking at the Arlo app to ensure information technology sees all the areas you want.
Field of view
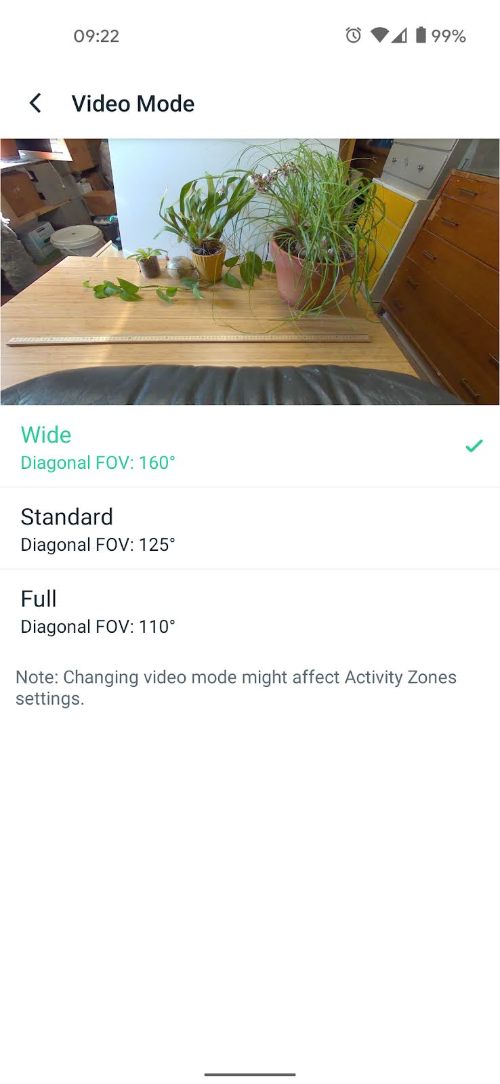
Prototype: John Carlsen, SafeWise
Like the Arlo Pro 4, some Arlo cameras permit yous change the field of view or how wide an area in front end of the camera is. Mostly, y'all want a wider view outdoors, where there aren't walls blocking your view. In contrast, choose a narrower view indoors, where information technology's unnecessary to record wider than your walls allow, which saves video bandwidth.
- Navigate to the Settings menu in the Arlo app.
- Select My Devices and choose the photographic camera y'all want to arrange.
- Choose Video Settings and then Video Mode.
- Discover a mode that fits your camera's surroundings.
Motion zones
Motion zones tell Arlo security cameras what to ignore when deciding to record. Arlo employs movement zones in two means: passive and adjustable.
Passive motion zones
The move sensor on many Arlo cameras has two zones past default. The bottom zone takes upwards 2-thirds of the video and is more sensitive, while the smaller elevation zone is less sensitive overall. You lot tin run across the top zone as a greyed-out expanse in the camera positioning bill of fare.
By positioning the photographic camera with the tiptop third covering the street, you can prevent passing vehicles from setting off the sensor equally oftentimes. This setting works without an Arlo Secure cloud subscription and doesn't crave a continuous power supply.
Adjustable move zones
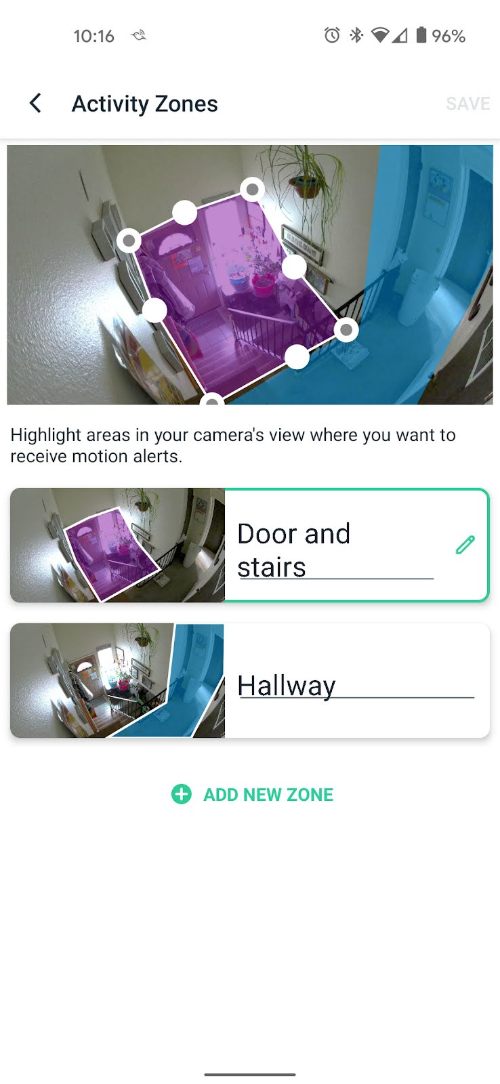
Image: John Carlsen, SafeWise
If you pay for an Arlo Secure Plan and connect your camera to a power outlet, you lot can create custom motion zones that tape activeness in those areas.
- Get to the Settings carte du jour in the Arlo app.
- Consider logging in on a web browser instead, since adjusting the zones tin can be harder on a small smartphone screen.
- Select My Devices and choose the camera you want to adjust.
- Choose Activeness Zones.
- Hitting the plus sign + to add a zone.
- Adapt the zone to cover an area (like a window or stairway).
- Name the zone for hereafter reference.
half-dozen. Test your Arlo photographic camera's motion detection
Arlo cameras rely exclusively on motility detection to know when to start recording a video prune. Yous can examination the motion detection's effectiveness and adjust its sensitivity using the Arlo app:
- Navigate to the Settings card in the Arlo app.
- Select My Devices and choose the photographic camera yous're testing.
- Select Device Utilities and then Motion Detection Test.
- This mode tells the camera's LED lite to blink amber when there'south motion.
- Move around the surface area you want the camera to monitor to see if it catches all your action.
- Suit the motion sensitivity slider if the camera is too sensitive or not sensitive enough.
- The sensitivity setting isn't universal—adjust your arming modes to match every bit needed.
7. Arm your Arlo
Arming an Arlo camera tells it to first sending notifications and recording video clips (if you have an Arlo Secure subscription or ready up local storage). It's also an excellent manner to protect your privacy. We recommend arming your photographic camera whenever you lot leave the house or go to bed.
Arlo offers five arming modes:
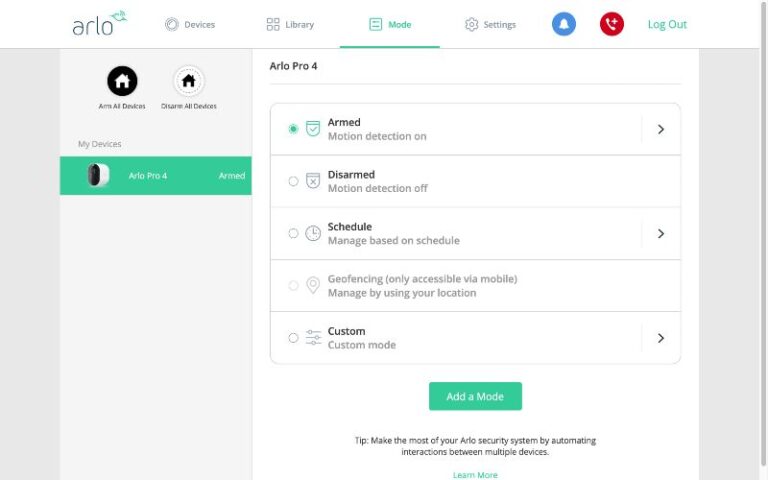
Image: John Carlsen, SafeWise
- Disarmed: no recording or notifications
- Armed: y'all manually arm using the app
- Schedule: fix specific times for the photographic camera to record—especially helpful at night
- Geofencing: camera arms and disarms based on your location
- Custom mode: you lot can accommodate how the camera reacts when armed
Photographic camera Safety: Help Preclude Your Cameras from Being Hacked
Subscribe to our Youtube channel, and acquire how to protect your abode, loved ones, and belongings.
FAQ
Newer Arlo security cameras like Arlo Essential, Arlo Pro four, and Arlo Pro 3 Floodlight don't require a base of operations station. Nevertheless, you lot need a base station on 4K models like Arlo Ultra 2 and older models like Arlo Pro 3 and Arlo Pro 2. Yous can use a base station with any Arlo cam to add local video storage.
Aye, y'all can utilise Arlo cameras without a subscription. These features are free:
- Viewing live video (but no cloud storage)
- Two-style sound
- Notifications (but no smart notifications)
- Local storage (if using a base of operations station)
You can add other users through the Arlo app:
- From the Settings carte: choose Grant Access and tap the Add together choice.
- Enter the name and email address of the person you desire to add to your Arlo photographic camera.
- The new user volition receive an email to verify their account admission in the Arlo app.
- You can adjust permissions to suit each user's needs and responsibilities.
- If you have multiple cameras, you can limit admission to specific cameras.
Arlo cameras fail to connect for various reasons:
- The camera is too far from your wireless router.
- The camera isn't on the aforementioned network as your mobile device during setup.
- The camera is incompatible with your 5 GHz wireless network. Make sure you lot're using a 2.4 GHz wireless network.
- The camera doesn't take your network's electric current login credentials. Check that you used the right network name and password.
- The photographic camera didn't scan the QR code correctly when setting up Wi-Fi. Re-browse the code and listen for an audible chime.
- The photographic camera timed out earlier connecting to your network. Press the sync button to starting time the sync process again.
What yous can't do without internet
- View alive video
- Use two-fashion audio
- Adjust photographic camera settings
- Save videos to cloud storage
What you can do without cyberspace
- Record videos using local storage (if y'all set it upward using a base station).
- View footage on when your phone'south on the same network. Just you need to turn on Direct Storage Access in the Arlo app outset.
Yep, you must employ an Ethernet cable to connect your Arlo base station to your router. There should be ane in the box.
Related articles on SafeWise
Recent Articles

Back To Meridian
Source: https://www.safewise.com/set-up-arlo-cameras/
0 Response to "How To Set Up Arlo Camera System"
Post a Comment